
This blog is the continuation of my previous article about Fedora Silverblue. Just to recap, Fedora Silverblue is an immutable OS which provides stability, reliability, security, and more. The package manager rpm-ostree behaves like a git but for the operating system. To create layered packages, use rpm-ostree, but to install CLI apps, container technologies, development tools, use Toolbox. In this blog article, let us dive into the toolbox and its usage in Fedora Silverblue.
Table of Contents
Download Fedora Silverblue
I am running Fedora Silverblue in my VMsare Workstation Player. To download the Fedora Silverblue ISO, head to https://silverblue.fedoraproject.org/download
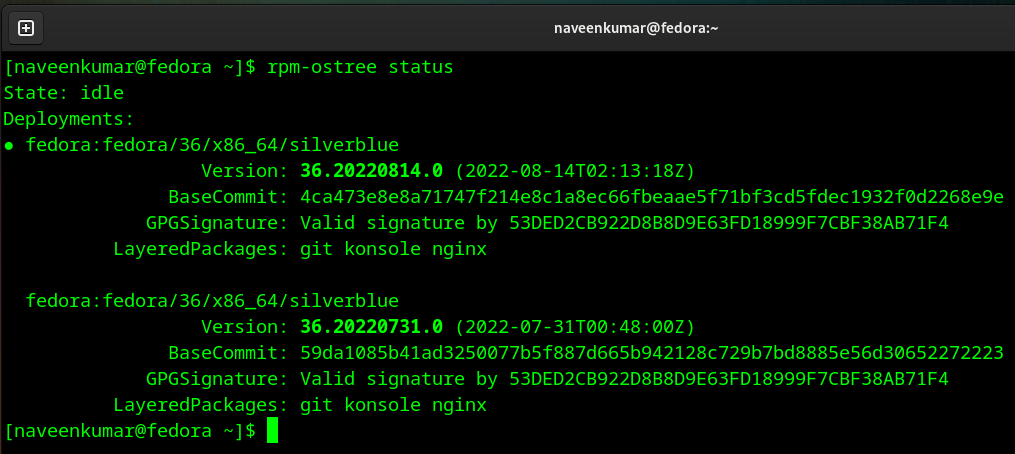
Once it is installed, launch the terminal to check the status of the deployment using rpm-ostree status
What is a Toolbox?
Toolbox is a utility which comes out of the box in Fedora Silverblue. To install it in the older versions of Fedora Workstation use sudo dnf install toolbox or in Fedora Silverblue 30 or older using sudo rpm-ostree install toolbox. Here is the output of the man toolbox command.
Toolbox enables developers to create containerized command-line environments for development and debugging using Podman.
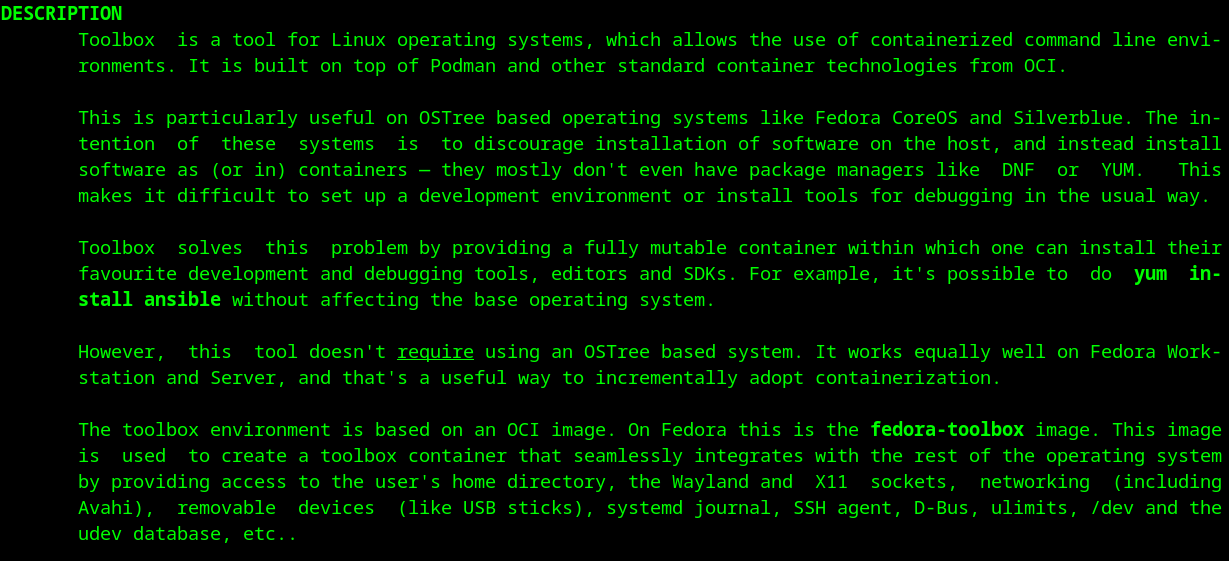
Using the toolbox, it is easy to create and manage containerized workflows. Whenever you spin up a new container, it will get access to your home directory and other locations, username and permissions, systemctl, Kerberos, system and session D-Bus, and common tools like dnf and more.
Hello, Toolbox!
There are two primary commands you need to remember.
toolbox create and toolbox enter
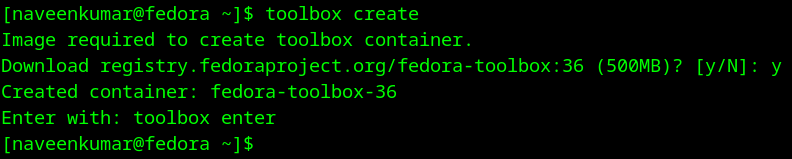
Let us issue the create command to create an environment. Press y to the prompt to download the image. By default, it will download the Fedora image from the below registry.
To view the list of images and containers, issue toolbox list as shown below.

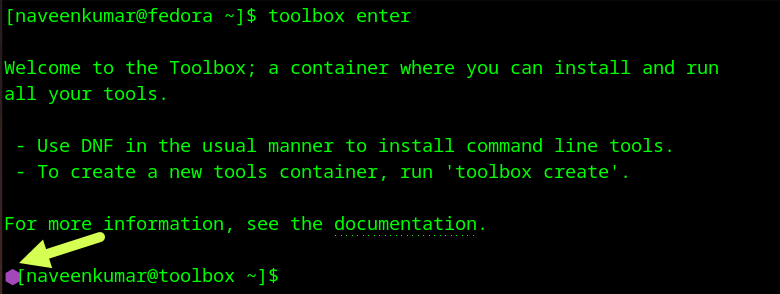
Now, let us enter into the toolbox using the toolbox enter command. Here is the welcome message with the diamond prompt which indicates that we are inside the toolbox container. Clever, isn’t it?
In this container, let us install k6 – a powerful load testing tool from Grafana.
First issue the sudo dnf update command, then issue the below commands.
sudo dnf install https://dl.k6.io/rpm/repo.rpm
sudo dnf install k6
To validate the installation, issue k6 version command.

You can install the desired packages in this environment. To test this environment, let us run a quick smoke test using k6.
The below command will create a loadtest.js file in the current working directory.
cat << EOF > loadtest.js
import http from 'k6/http';

export const options = {
  stages: [
    { duration: '10s', target: 10 }
  ],
  thresholds: { http_req_duration: ['avg<100', 'p(95)<200'] },
  noConnectionReuse: true,
  userAgent: 'MyK6UserAgentString/1.0',
};

export default function () {
  http.get('http://test.k6.io/');
}
EOF
To run the smoke test, issue the below command. This will run the script and store the results in run1.csv
k6 run --out csv=run1.csv loadtest.jsOnce the test is done, let us exit from the container using the exit command or by pressing CTRL + D.
If you type less run1.csv, you can see the results. No need to mount the volume to sync the content between the container and the host. It will be taken care by toolbox.
Let us create another container with a new name for jmeter using the below command.
toolbox create jmeter
Once the container is created, enter toolbox enter jmeter command to login into it.
Now, let us install Java and JMeter using the below command.
# install Java
sudo dnf update
sudo dnf install java-11-openjdk.x86_64

# install JMeter
wget https://dlcdn.apache.org//jmeter/binaries/apache-jmeter-5.5.tgz
tar -xf apache-jmeter-5.5.tgz

# removing unnecessary artifacts
rm apache-jmeter-5.5.tgz
rm -r apache-jmeter-5.5/licenses/ apache-jmeter-5.5/docs/ apache-jmeter-5.5/printable_docs/ apache-jmeter-5.5/LICENSE apache-jmeter-5.5/README.md

# check JMeter version
apache-jmeter-5.5/bin/jmeter.sh -v

# run sample JMeter test
apache-jmeter-5.5/bin/jmeter.sh -n -t apache-jmeter-5.5/bin/examples/CSVSample.jmx -l Run1.jtl

# check the results
cat Run1.jtl
Now we have two containers, completely isolated. If you somehow messed up, it is easy to spin up a new container either to debug or start from scratch.
Just to verify, exit from the container and issue toolbox list.

Remove the container
Once you are done with your work, you can easily remove the container using toolbox rm jmeter. But before that, you need to stop the container using podman stop jmeter, otherwise, you cannot remove it.
Final Words
As we have seen above, using the toolbox is a breeze and quick. It is swift in creating and managing containers. Thanks to podman. Toolbox works great for the Fedora ecosystem. But if you want other distros, the toolbox needs work. Enter distrobox for your needs. I will post a new article soon.