
Online web editors are a great productivity tool for web developers, tech content creators, testers, and more. Whether for debugging or to make quick changes or to run some tests. We do have vscode.dev for free, so why do we need to spin up another instance in Digital Ocean?It’s convenience. In this blog post, let us learn how to spin VS Code for the Web in the Digital Ocean.
Table of Contents
VS Code
VS Code is one of the famous editors among developers, testers, system admins and more. After Microsoft procured the code.dev domain back in 2019, they redirected vscode.dev to code.visualstudio.com. But today vscode.dev opens a lightweight VS Code in the browser with no install.

Using VS Code for the web, we can do development, take notes, review the code, and more. You can use your Chromebook or iPad too.
Coder
To deploy VS Code in the Digital Ocean, we are going to leverage Coder. Coder helps to deploy the development workspace to the cloud or your own infrastructure. Coder has a community flavor which is free, open source, and supports GitHub login and OpenID.
VS Code in the Digital Ocean
To deploy VS Code in the Digital Ocean cloud, all you need is a Digital Ocean account which is free to create. Sign up using this link to receive $100 DO credits valid for 60 days.
After login to your DO account, navigate to the Droplets page, then click Create > Droplets.
Choose the latest version of Ubuntu.
Select the Basic plan.
Select the Regular with SSD option for the CPU.
Select the affordable plan which is $4 per month which gives you 512 MB, 1 CPU, 10 GB SSD, and 500 GB transfer.
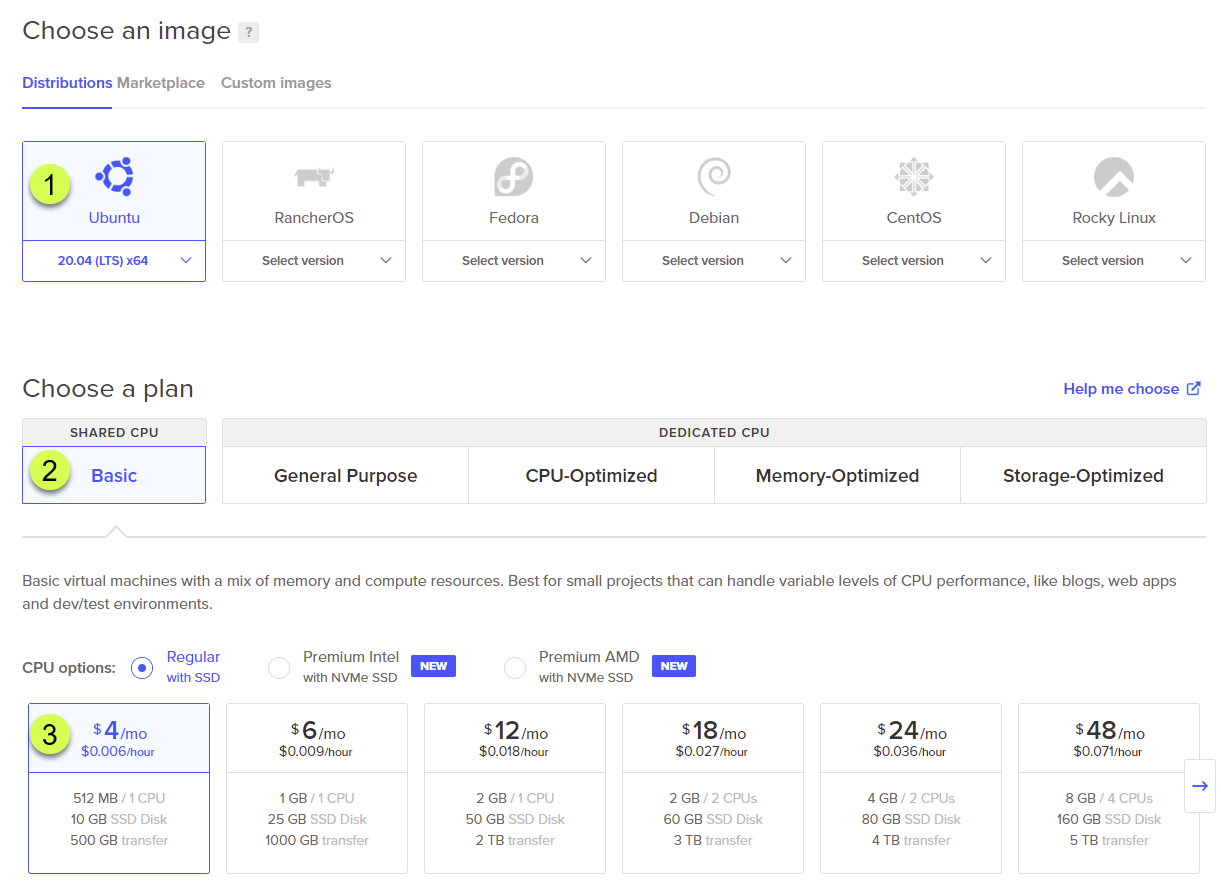
Choose a datacenter region closer to you. Select the authentication method either SSH keys or password. I am going to choose the SSH key, which is a more secured method of authentication.
The next step is to configure the user data for the droplet. Under the additional options, copy the script from here and paste into the User data text field as shown below.

Optionally, you can enter the tags and hostname and then click the Create Droplet button.
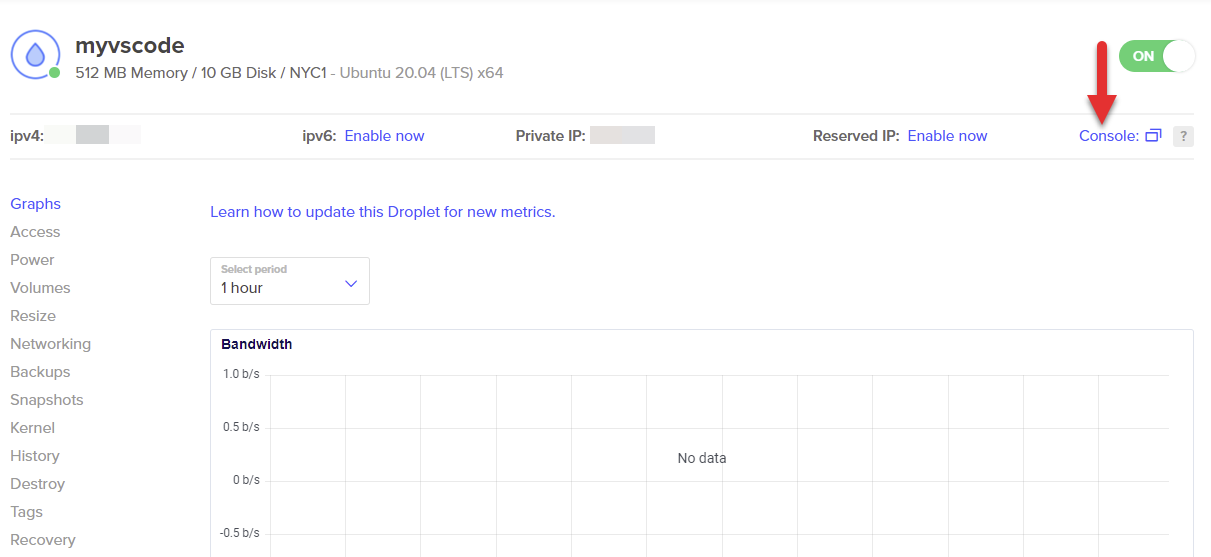
Once the droplet is up and running, navigate to the Droplet page to fetch the public IP address.
Launch your favorite browser and paste the IP address and hit enter.
In few instances, it will redirect to this page. To troubleshoot, go to the droplet console using the Console link as shown below.
Follow the below instructions.
# Check if code-server is running
systemctl status code-server@coder
# Check if journalctl is giving us logs, and if something failed
journalctl -u code-server@coder
# If journalctl isn't giving logs:
systemd restart systemd-journald
# or
sed -i.bak 's/#Storage=auto/Storage=persistent/' /etc/systemd/journald.conf
mkdir -p /var/log/journal
systemctl force-reload systemd-journald
systemctl restart systemd-journald
# then, if needed:
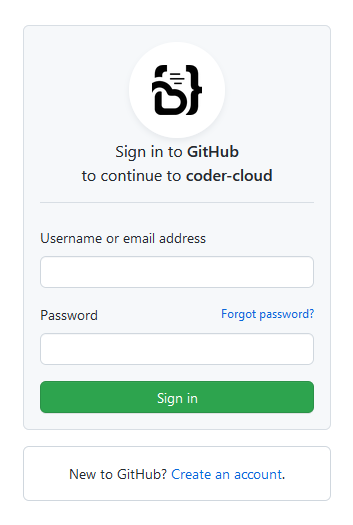
sudo rebootAfter you followed the above steps, launch the IP address again in your browser. If you followed the instructions properly, it will launch the GitHub page as shown below.
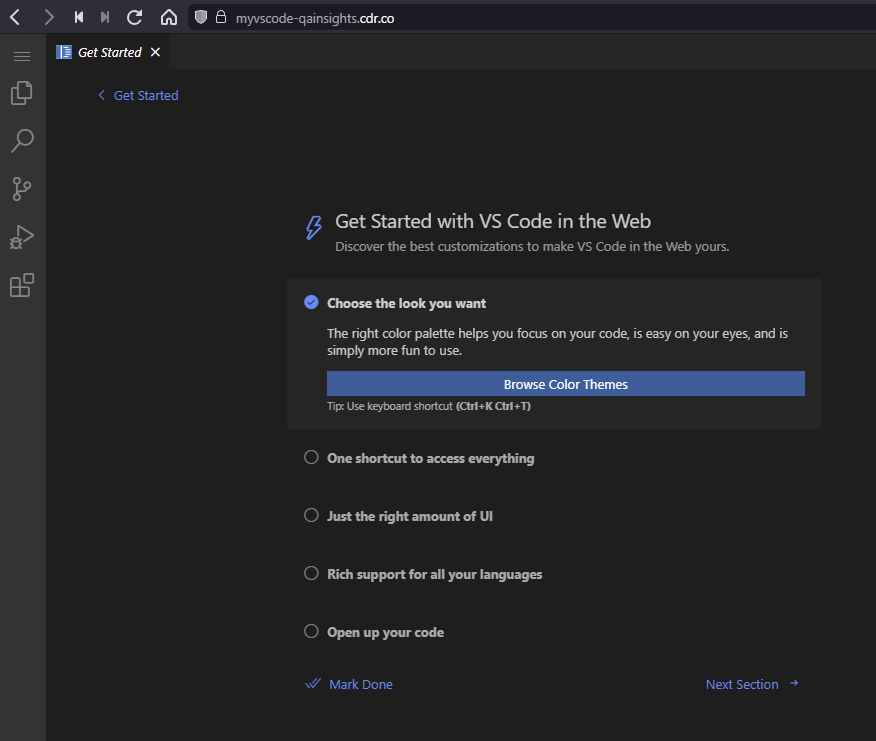
After successful authentication, you can see the VS Code online editor as shown below.
In the Droplet page, you can monitor the CPU, Memory, and Bandwidth graphs. Suppose, if you want more horsepower, you can upgrade the instance on the Resize page. When not in use, you can power off the instance (still you will be billed).
Final Thoughts:
It is always nice to have our own instance for our development purpose. The free flavor of VS Code is ephemeral. But if you spin up on your own, it’s all yours to play with. In the next blog, we will see how to make use of VS Code Server (beta) in the Digital Ocean.