
Welcome to Learn JMeter Series! This series helps you to learn Apache JMeter in a much simpler way with the relevant examples and exercises. This tutorial focuses on Data Parameterization in JMeter.
- Introduction to JMeter Elements
- Downloading and Installing JMeter
- Introduction to Apache JMeter
- JMeter Execution Order and Scoping Rules
- Recording on JMeter
Table of Contents
What is Data Parameterization?
Data Parameterization helps to test your application under test using multiple sets of data. In the real world, each user is unique; you cannot reuse the data while running the load test in a non-production environment.
If you keep reusing the test data in a load test, data will be read from the cache layer instead from the disk.You may not be able to find the potential bottleneck(s) in your application or infrastructure.
It is critical to use unique sets of data for any form of performance testing to measure the performance like a real world scenario.
Parameterization Technique
To send different or unique data, usually you store the test data in a flat file and associate them using the variable name. The typical format of a data file is comma separated value. But you can use .txt or other valid formats.
Different tools adopt different strategy, but on the high level, you store the data from a file and the tool will read it for you in a sequential order by default. The behaviour could be changed based on which tool you are using for the load testing.
Solutions like Locust or k6 might leverage third party library for the advanced usage of reading values from CSV file.
Now, let us see how to adopt parameterization in JMeter. JMeter has a built-in config element to read the values from the files. Enter CSV Data Set Config. Apart from the config element, you can also leverage the functions such as __StringFromFile and __CSVRead.
The CSV Data Set Config element is way much easier than the functions.
About CSV Data Set Config
To add CSV Data Set Config, right-click on the appropriate element (usually it would be Test Plan or Thread Group) > Add > Config Element > CSV Data Set Config.
In this element, you need to add your test data file path. Always use the relative path of the test data. Before we deep dive into CSV Data Set Config, first let us prepare the test data.
In this example, we are going to test the Bank of Anthos application which can be accessed at https://bank-of-anthos.xyz/login
Please do not inject any load, we are just going to learn parameterization in this article.
Below is the business flow:
- Login to the http://bank-of-anthos.xyz app.
- Click on Send Payment to complete the transaction.
- Click on Deposit Funds to complete the transaction.
- Logoff.
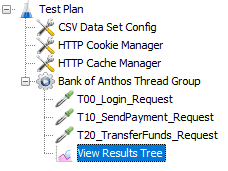
Record the above business flow in JMeter and keep the test plan ready.
Your test plan may look like this:
Before we begin, as a performance tester/engineer, we need to make sure that we have all the test data in place. As we are using the demo app for learning purpose, we need to collect the relevant test data.
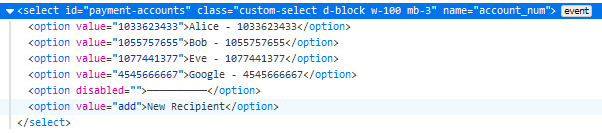
Considering the above scenario, we need to collect the account numbers and the amount. To collect the account number, we can get it from the demo app. If you inspect the element in the browser, you will get all the account numbers.
Open your favorite editor, add the two column headers: P_AccountNumber, P_Amount and add all the data as shown below.
P_AccountNumber, P_Amount
1033623433,10
1055757655,20
1077441377,55
4545666667,100
Save it as CSV format and name the file as BankofAnthos-Test-Data.csv.
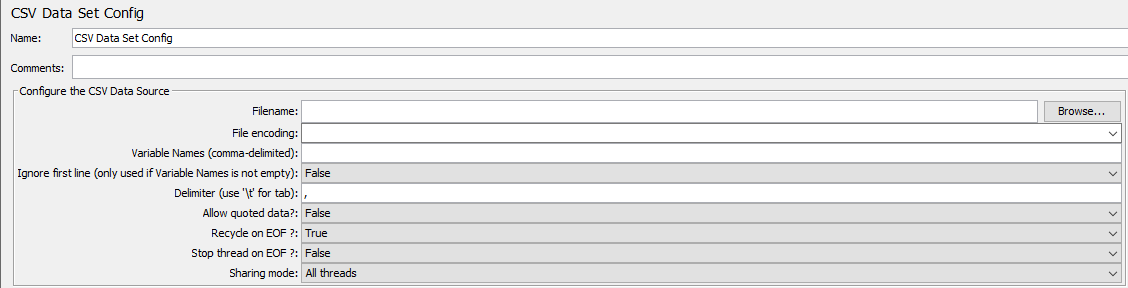
Go back to CSV Data Set Config, and map the CSV file using the relative path as shown below.

Keep the remaining fields as default. We will go through it one by one.
Go to the second HTTP request, i.e. /payment request, in Paremeters tab, replace the account_num from 1033623433 to ${P_AccountNumber} and amount from 1 to ${P_Amount} as shown below.
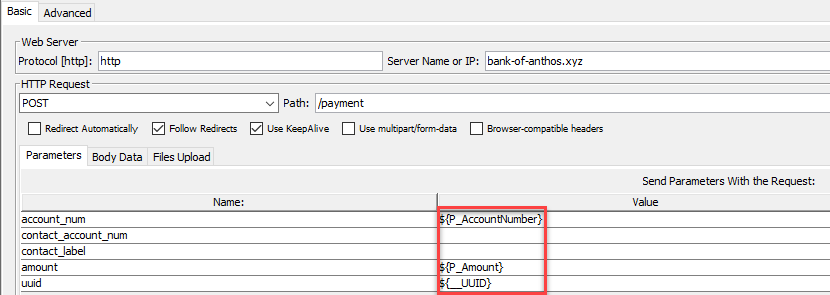
When JMeter executes the test plan, it will read the right column from the CSV file and map it in here.
Now if you run the test plan, in the View Results Tree, you can see the below output for the payment request.

Run your test with multiple iterations
Click on Thread Group and increase the number of iterations (i.e. Loop Count) to 4 and execute the test plan.
If you expand each iteration response in the View Results Tree, you can see all your test data has been sent to the server.
When you run your load test, usually the Loop Count should be infinite, so that the test plan will make use of all the test data from the file.
Now let us deep-dive into CSV Data Set Config.
The following are the fields in CSV Data Set Config and its purpose.
| Field Name | Purpose | Mandatory (Y/N) |
| File Name | Relative or absolute path of the test data file. The recommended file extension is CSV. | Y |
| File Encoding | Encoding type e.g. UTF-8 | N |
| Variable Names | You have to name the column either in the test data file or here. But follow the same conventions throughout your test suite to avoid confusion. The recommended practice is using the variables names in the file as a header. | N |
| Use first line as Variable Names | If you want to ignore the first line in the test data file, then mark this as Yes. Else, JMeter consider the first line as the test data. | N |
| Delimiter | Usually this would be a comma, but you can use other delimiters such as \t etc. | Y |
| Allow quoted data? | If the test data has quoted data (“) then you can mark it as Yes. | Y |
| Recycle on EOF? | If you want to recycle the test data, then mark it as Y. Else, No. | Y |
| Stop thread on EOF? | If you would like to stop the thread on EOF, then mark it as Y. Else, No. | Y |
| Sharing mode | To share the test data among all the threads (default), select All threads. If the file needs to be opened once for each TG, then select the Current thread group. If the file needs to be opened separately for each TG, then select Current thread. If you would like to use some identification among thread groups to share the file, you can edit and mention the identifier e.g ${__threadNum} | Y |
CSV Read Function
You can also use the CSV Read function if the test data file is less. The below function will read the first column, and then it will read the next row for the next iteration.
${__CSVRead(./BankofAnthos-Test-Data.csv,0)}${__CSVRead(./BankofAnthos-Test-Data.csv,next)}
For larger files, it is recommended to use CSV Data Set Config or StringFromFile function.
StringFromFile Function
Suppose if you have multiple files and would like to read the account number, you can use the StringFromFile function.
The function to read the account number is:
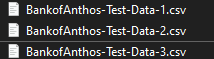
${__StringFromFile(BankofAnthos-Test-Data-#.csv,,1,3)}
But this will work only for one column. If you have multiple columns, you need to create other set of files and a function.
In the above function, you need to mention the file name with the index # and starting file number and ending file number.
Conclusion
In the above example, we have seen various methods of reading the values from files. CSV Data Set Config has flexibility by all means. It is also important to choose the sharing mode wisely and mention the relative path for distributed load testing.