
I have already kicked off a brand-new series on my YouTube channel called Learn Chaos Engineering series. The first few episodes will be focusing on LitmusChaos. I have been working on LitmusChaos for the past several weeks. The more I work, the more questions arise about the mechanics of LitmusChaos. In episode 2, we saw an EC2 instance termination experiment using AWS Secrets, which is one way to run chaos on AWS. Exposing secrets and access keys is not a recommended practice. Enter IRSA. IAM Role for Service Account. Instead of creating a video, let me write it as a blog post; I hope it will make a great impression on people who are getting started. Before writing this blog post, I practiced several times. Let us proceed.
Table of Contents
Prerequisites
There are several moving components when it comes to AWS EKS. Few are optional, but it would be a great add-on if you hit a roadblock. e.g. I am using Octant to visualize the Kubernetes ecosystem. You can use Lens or Kubernetes Dashboard if you are familiar with them.
Below are the stuffs you need before you proceed:
- eksctl to spin up AWS EKS cluster
- LitmusChaos
- AWS IAM Role and Policy creation access
- Helm (optional)
- Octant (optional)
- EC2 instance to run the experiments on it.
What is LitmusChaos?
Litmus is an open source Chaos Engineering platform that enables teams to identify weaknesses & potential outages in infrastructures by inducing chaos tests in a controlled way.
Recently, it was acquired by Harness. It is an CNCF Incubation project.
eksctl
eksctl is a great CLI utility to perform various AWS EKS tasks such as cluster management, hardening the security, GitOps and more. It is written in Go and uses CloudFormation under the hood.
Using eksctl we can create a cluster in one command. But I do not recommend that. e.g. it will create two m5.large worker nodes on us-west-2 which we do not want for learning purpose.
Instead, use the --dry-run command to output to a file and modify the parameters such as region, instance type, availability zone etc.
Install eksctl from this documentation.
Enter the below command which will create a EKS yaml manifest.
eksctl create cluster --name=chaos-playground --region=us-east-1 --dry-run > chaos-playground.yaml
The name of our cluster is chaos-playground and will be created on us-east-1. Change the region based on your location so that you will reach the nearest availability zone.
Open the yaml manifest in your favorite editor e.g. vim chaos-playground.yaml
Change the instance type to t3.medium. Save it and apply the below command to start creating a cluster.
eksctl create cluster -f chaos-playground.yaml
Go for a coffee or tea or your favorite beverage and come back after 15-25 minutes.
Once the EKS is up and running, you will get the below message.
EKS cluster "chaos-playground" in "us-east-1" region is ready
Updating kube config
You might be running various clusters locally or in the cloud. Let us update the kube config current context using the below command.
aws eks update-kubeconfig --name chaos-playground --region us-east-1
The above command change the context to chaos-playground. To validate the current context, enter the below command.
k config current-context
I have an alias k for kubectl. You may need to enter kubectl in place of k.
Install kubectl from here.
LitmusChaos
Let us begin by installing LitmusChaos in litmus namespace. You can install LitmusChaos from here. By default, the services litmusportal-frontend-service and litmusportal-server-service are exposed as NodePort. We need to expose it as ClusterIP. I have already changed the type and kept it in my GitHub repo. Let us apply that to our cluster using the below command.
k apply -f https://raw.githubusercontent.com/QAInsights/Learn-Chaos-Engineering-Series/main/LitmusChaos-AWS-EKS/litmuschaos-2.9.0.yaml
The above command will create various Kubernetes objects as shown below.
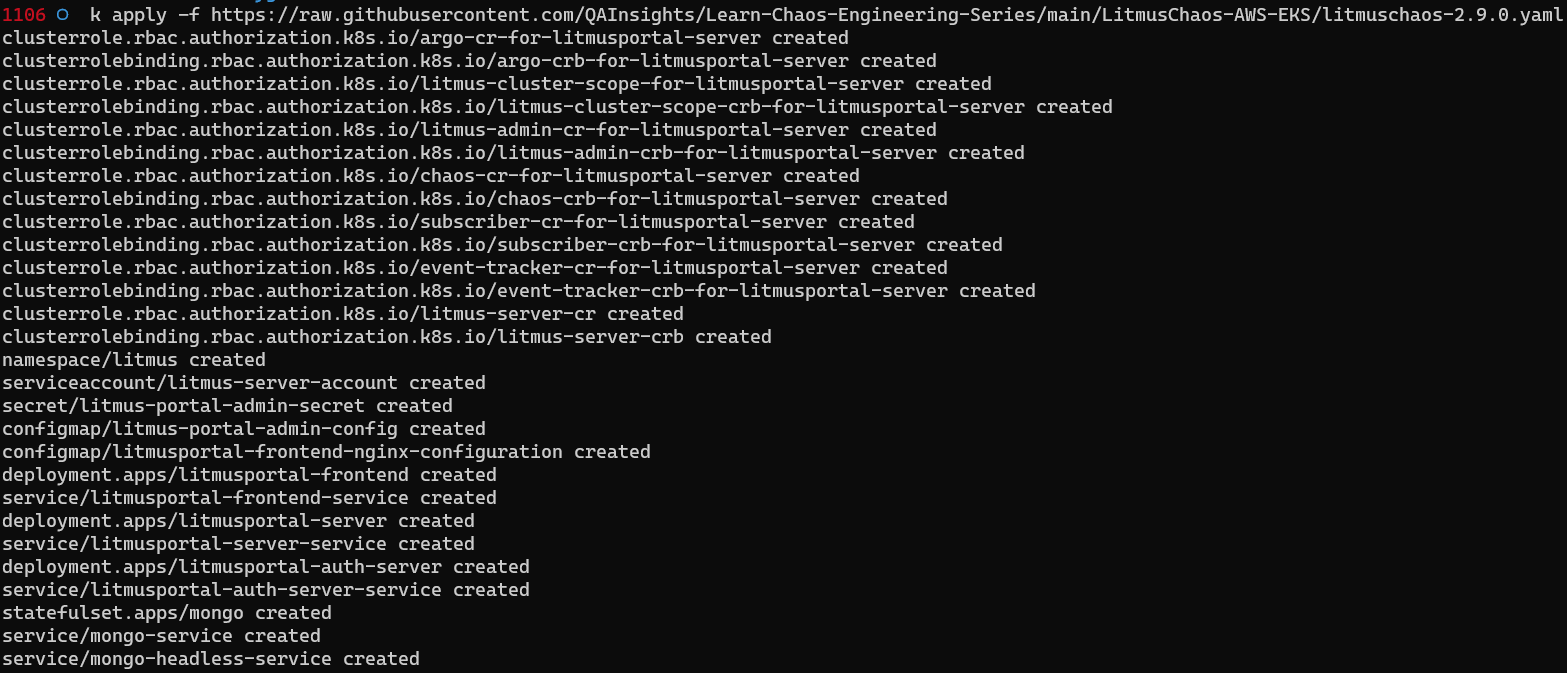
By default, all the Litmus Custom Resource Definitions (CRDs) will be installed in the litmus namespace.
Let us verify the pods which are running in the litmus namespace.
k get po -n litmus
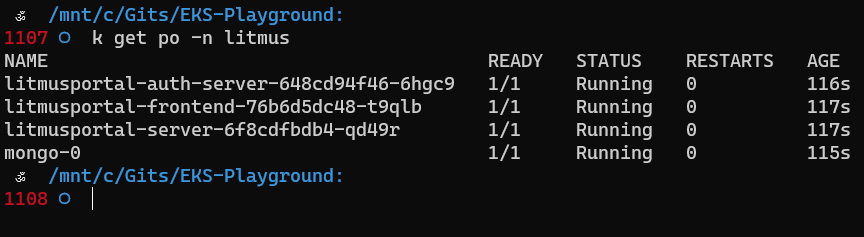
k get po -n litmusThe next step is to expose the service litmusportal-frontend-service to get the load balanced URL.
Enter the below command to patch the service.
k patch svc litmusportal-frontend-service -p '{"spec": {"type": "LoadBalancer"}}' -n litmus
To get the load balanced URL, enter the below command.
k get -n litmus svc litmusportal-frontend-service -o wide
You will get the URL and port. e.g. you can access the LitmusChaos UI using port 9091 and URL http://a336e7fc0d2d64029abdf53d95aa1cca-97284119.us-east-1.elb.amazonaws.com:9091
Let us wait for a few moments before the URL is reachable. Meanwhile, let us install Octant from here.
Run the Octant program and launch 127.0.0.1:7777 the homepage of Octant.
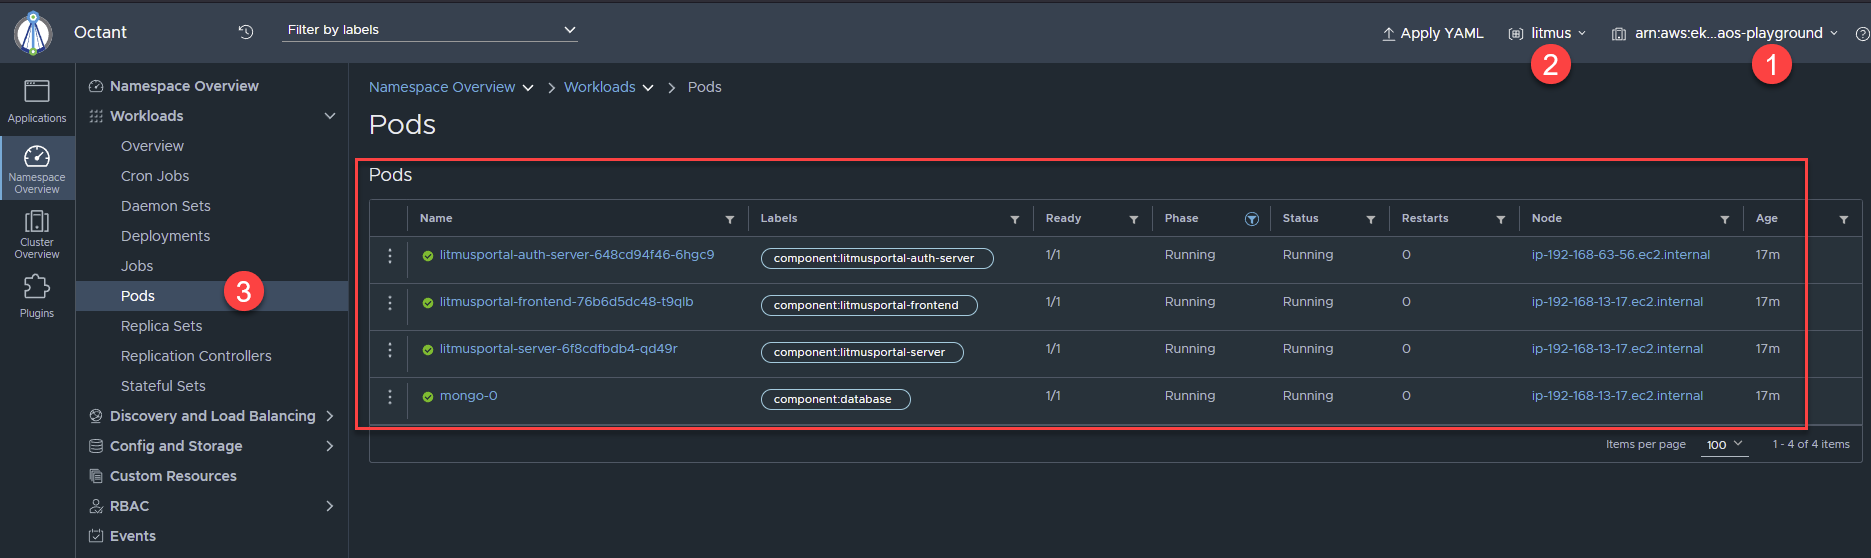
The first step is to configure the kube config. Go to Preferences > General and note down the kube config path. Make sure our AWS EKS kube config is present in the Octant kube config. If it is not present, Octant will not display the chaos-playground objects.
Here are the pods which are running in litmus namespace on chaos-playground cluster.
Now it is time to launch the LitmusChaos UI.
The default credential is admin/litmus
Upon the first time login, LitmusChaos will prompt you to change the password. You can skip it or change the credentials.
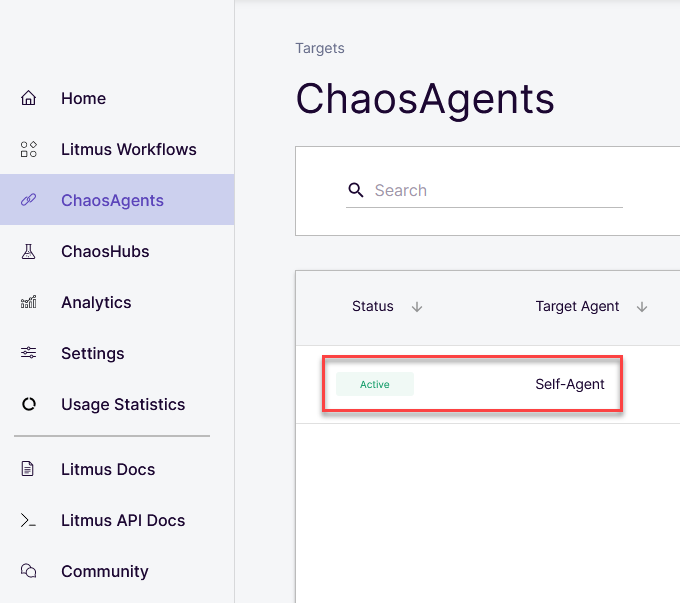
After successful login, click ChaosAgents to validate the Self-Agent status.
Wait till the Self-Agent is in Active status as shown below.
Congratulations! LitmusChaos is up and running now. Let us run an experiment. Before we begin running the experiments, we need to form a hypothesis.
A single EC2 instance running with no auto-scaling group.
Provided
Failure of a single EC2 instance will disrupt the customer experience.
Hypothesis
Spin an EC2 Instance
If you are new to AWS, please follow this tutorial to spin an EC2 instance in your region.
For this demo, I have spun up an EC2 instance with t2.micro which is running a nginx server.

EC2 Terminate By ID Experiment
Let us go back to LitmusChaos and create a new experiment which will terminate the above EC2 instance using its ID.
Click Litmus Workflows > Schedule a workflow to start creating a workflow.
Select the Self-Agent, then click Next.
Click Create a new workflow using the experiments from ChaosHubs radio button and select Litmus ChaosHub, then click Next.
Click Next again, leaving the default values for the workflow name.
Click Add a new experiment and search for ec2.
Select kube-aws/ec2-terminate-by-id and then click Done.

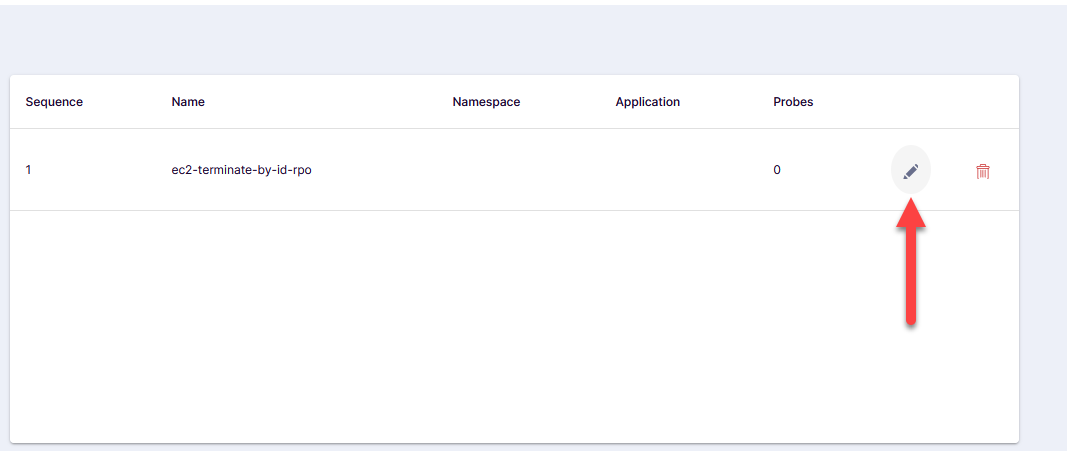
Click the pen icon to edit the experiment.
Click Next three times, leaving the default options.
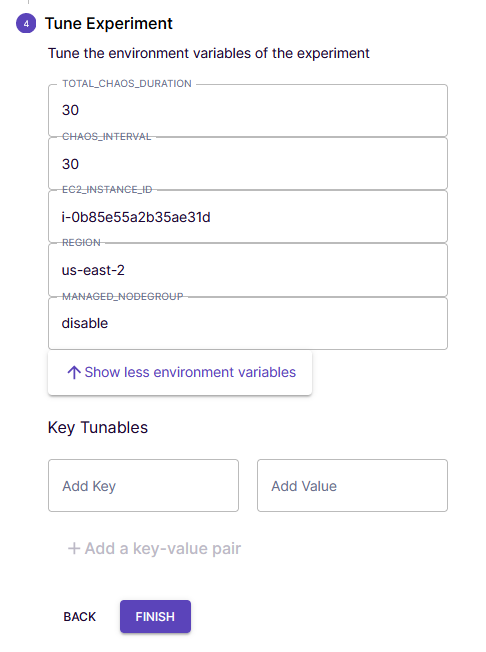
Under the Tune Experiment section, enter the EC2 Instance ID.
Click Show more environment variables button to enter the region, then click Finish.
Click Next few times and then Finish to start the experiment. This experiment will fail after a while.
Why it got failed?
LitmusChaos objects doesn’t have any access to kill the EC2 instance. Even though we are running everything on the same AWS account. To authenticate LitmusChaos objects to the AWS resources, there are two ways: using AWS Secrets or using IAM service.
Mounting AWS secrets is not a recommended practice for running the experiment. As we are exposing the secrets in YAML file.
Enter IRSA. IAM Role for Service Account.
IAM is a web service that helps you securely control access to AWS resources.
Service Account in this context is meant for Kubernetes. A Kubernetes service account provides an identity for processes that run in a pod.
The following are the steps which are involved in creating IAM roles for service account.
- Create OIDC provider
- Create IAM Role and Policy
- Associate IAM Role
Create OIDC provider
The OIDC concept is beyond the scope of this article. On a high level, OpenID Connect authenticates the AWS API with the supported identity providers and receives a JWT token. This token can be passed into AWS STS to receive temp credentials to authenticate into any AWS service like EC2.
Enter the below command to validate the OIDC provider for the cluster.
aws eks describe-cluster --name chaos-playground --region us-east-1 --query "cluster.identity.oidc.issuer" --output text
This will list the following output.
https://oidc.eks.us-east-1.amazonaws.com/id/B718311B05C5C27CCF96C406CEXXXXXX
If there is no output, enter the below command to create one.
eksctl utils associate-iam-oidc-provider --cluster chaos-playground --region us-east-1 --approve
Create IAM Policy and Role
Copy the below policy and save it as chaos-playground.json. Replace the account ID with your account ID.
{
    "Version": "2012-10-17",
    "Statement": [
        {
            "Sid": "VisualEditor0",
            "Effect": "Allow",
            "Action": "ec2:*",
            "Resource": "*"
        },
        {
            "Sid": "VisualEditor1",
            "Effect": "Allow",
            "Action": "sts:*",
            "Resource": "arn:aws:iam::<your-account-id>:role/*"
        }
    ]
}
To create a policy, enter the below command.
aws iam create-policy --policy-name ChaosPlaygroundPolicy --policy-document file://chaos-playground-policy.json
Each entity in AWS has a unique identifier called ARN. To retrieve the ARN for the above policy, enter the below command.
aws iam list-policies --query 'Policies[?PolicyName==ChaosPlaygroundPolicy].Arn' --output text
Copy the output which we are going to need it in the subsequent step.
The next step is to create a Trust Policy for our IAM role.
Save the below trust policy as chaos-playground-trust.json and make sure you replace the OIDC value appropriately.
{
	"Version": "2012-10-17",
	"Statement": [
		{
			"Effect": "Allow",
			"Principal": {
				"Federated": "arn:aws:iam::<your-account-id>:oidc-provider/oidc.eks.us-east-1.amazonaws.com/id/B718311B05C5C27CCF96C406XXXXXXX"
			},
			"Action": "sts:AssumeRoleWithWebIdentity",
			"Condition": {
				"StringEquals": {
					"oidc.eks.us-east-1.amazonaws.com/id/B718311B05C5C27CCF96C406XXXXXXX:aud": "sts.amazonaws.com"
				}
			}
		}
	]
}
aws iam create-role --role-name Chaos-Playground-Role --assume-role-policy-document file://chaos-playground-trust.json
Once the role is created with the trust policy, the next step is to attach a policy which we created earlier, i.e. ChaosPlaygroundPolicy
To attach it to the IAM role, enter the below command.
aws iam attach-role-policy --policy-arn arn:aws:iam::<your-account-id>:policy/ChaosPlaygroundPolicy --role-name Chaos-Playground-Role
Associate IAM Role
To associate the IAM Role to the Kubernetes Service Account, the first step is to create a service account using eksctl command.
Enter the below command to create a IAM SA.
eksctl create iamserviceaccount --cluster=chaos-playground --namespace=litmus --name=ec2-terminate-sa-litmus --attach-policy-arn="arn:aws:iam::<your-account-d>:policy/ChaosPlaygroundPolicy" --override-existing-serviceaccounts --approve --region us-east-1
To validate all the service accounts in litmus namespace. Enter the below command.
k get sa -n litmus

k get sa -n litmusAfter creating a service account, the next step is to annotate the service account with the IAM role ARN using the below command. The below command will annotate the litmus-admin service account. This will suffice for our experiment.
k annotate serviceaccount -n litmus litmus-admin eks.amazonaws.com/role-arn=arn:aws:iam::202835464218:role/Chaos-Playground-Role --overwrite
To validate the annotations, enter the below command.
k describe sa -n litmus ec2-terminate-sa-litmus

LitmusChaos Experiments
Let us run the experiment again. But before triggering it, we need to remove the mounted secrets from our experiment. As we are using IRSA, we do not need to mount it.
Head to LitmusChaos > Litmus Workflows > Schedules.
Click the vertical three dots and then click Download Manifest.

Open the manifest in your favorite editor. Remove the lines which has secrets. Save it.
Create a new experiment by upload the YAML as shown below. Then, start the execution.
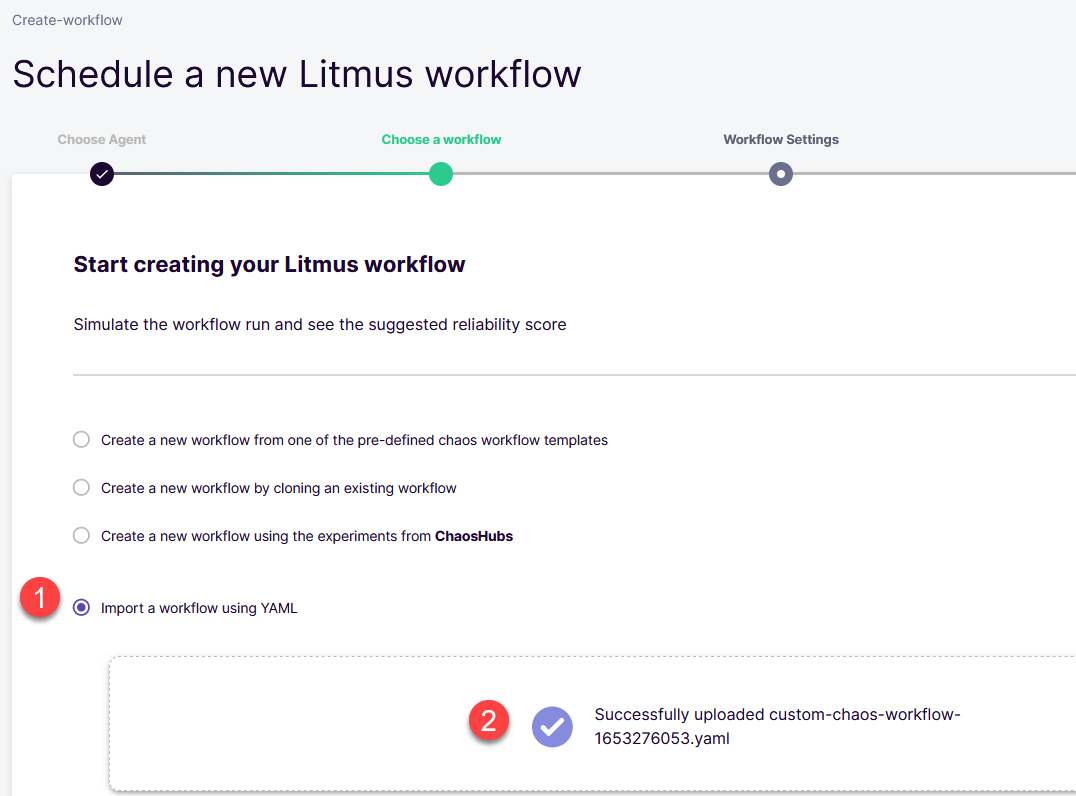
If all is good, this time, our experiment will pass.
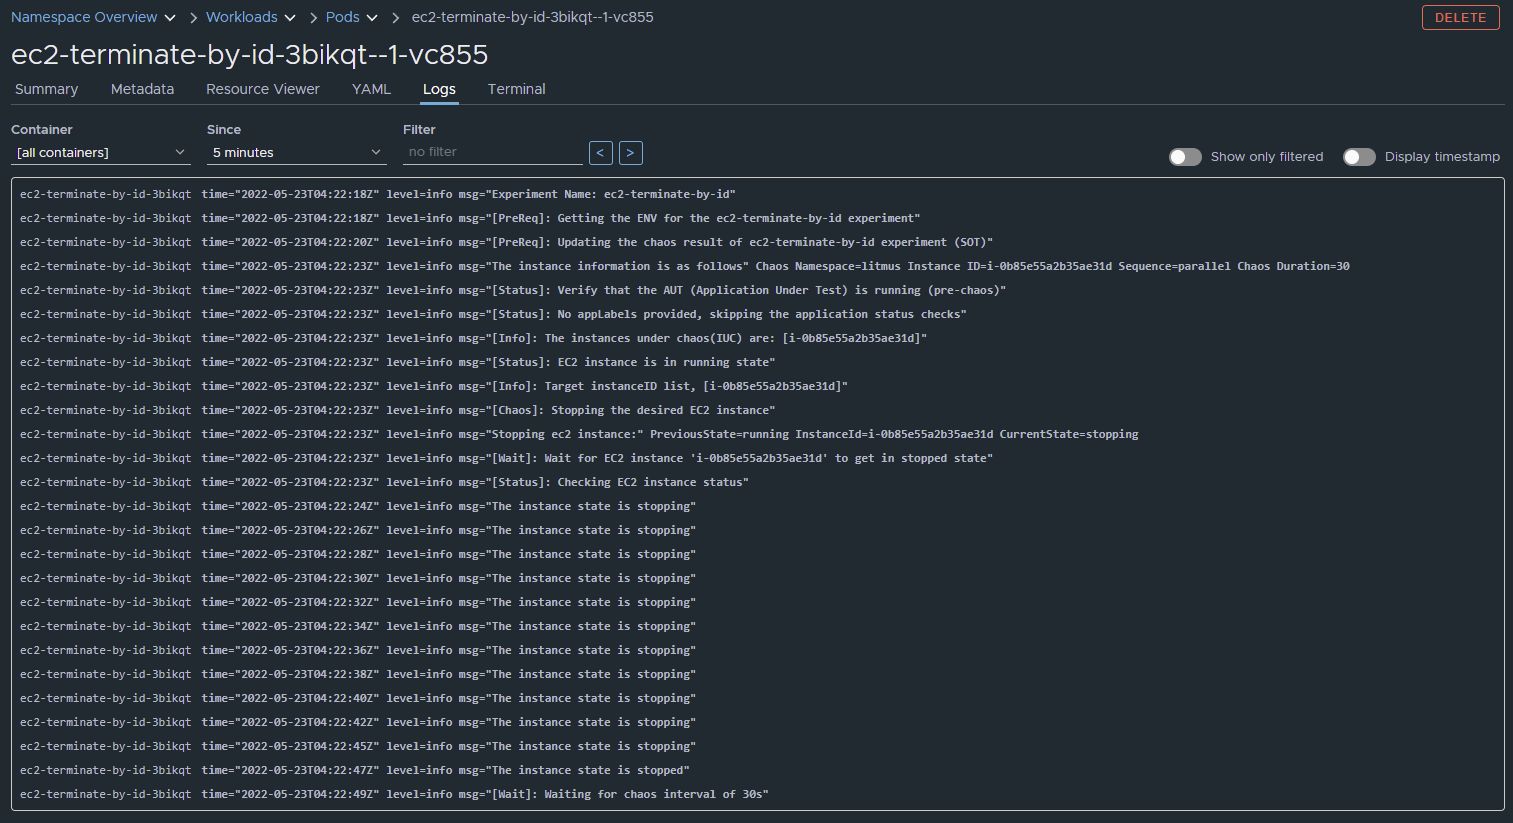
While the experiment is running, you can check the logs from Octant.
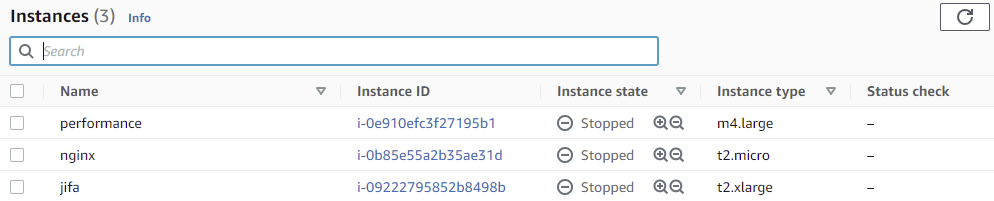
Or check the status in EC2 Instances dashboard.
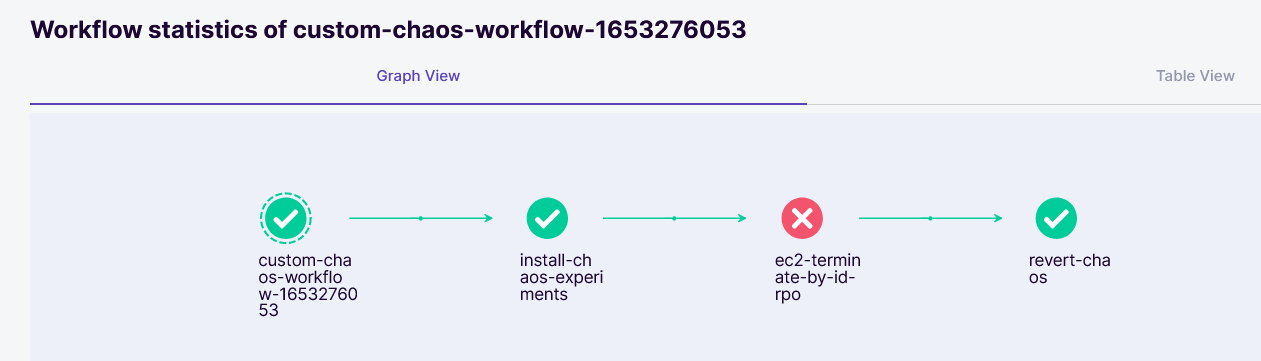
Once the experiment is completed, LitmusChaos will revert the state of the EC2 instance.

Here is the LitmusChaos workflow graph view.

Thanks for staying with me :)
Important Notes
- The policy we created basically opens for all the resources and the action, you must fine tune it for better security. Since it is a demo, I was being playful.
- The annotations are for all the service accounts. I yet to validate which SA needs to be annotated properly.
- Once the experiment is done, make sure you terminate the cluster and other resources.
Conclusion
IRSA is a beautiful implementation of a zero-trust framework. LitmusChaos is architected to answer the needs of enterprise security who are in the AWS and GCP ecosystem. We have just scratched the surface of LitmusChaos. Eventually, I will cover the other experiments in my channel.